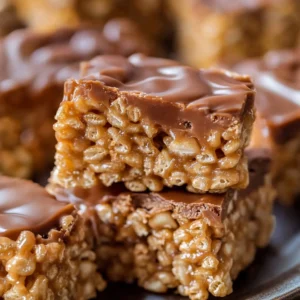
The kitchen’s buzzing with energy. A bowl’s been mixed, and the sweet aroma of melting peanut butter fills the air. I can already see half the treats disappearing before they even cool down. Peanut butter rice krispie treats are calling, and it’s hard to resist their sticky allure.

These treats are perfect for those last-minute cravings or nights when you need a quick dessert fix after dinner. With just three ingredients—crisp rice cereal, marshmallows, and creamy peanut butter—you can whip them up in under 15 minutes. They’re a delicious twist on the classic version that’ll satisfy your sweet tooth without any fuss. Grab a piece now!
Why You’ll Love This peanut butter rice krispie treats
- Super Easy: Just a few ingredients and minimal prep make it a breeze to whip up whenever you need a treat.
- Rich Flavor: The creamy peanut butter adds a delicious nutty sweetness that pairs perfectly with the crispy rice cereal.
- Crisp-Tender Texture: Experience that perfect balance of crunchy and soft with every bite, making it so satisfying to munch on.
- Versatile Snack: Great for parties, lunchboxes, or just as a quick pick-me-up — you can customize it with mix-ins like chocolate or nuts!
- Surprising Benefit: It’s no-bake, so you can enjoy a sweet treat without heating up your kitchen during hot summer days.
peanut butter rice krispie treats Ingredients
Base Ingredients:
- 3 cups Rice Krispies cereal — use a fresh box for the best crunch.
- 1 cup peanut butter (creamy or crunchy) — creamy gives a smoother texture; crunchy adds fun bites.
- 1 cup mini marshmallows — they help bind and add sweetness, don’t skip them.
- 1/4 cup unsalted butter (for melting) — unsalted is best to control the overall flavor balance.
- 1/2 cup honey (or corn syrup) — honey adds a rich flavor; corn syrup can be used for a more neutral taste.
*Full measurements in the recipe card below.*
How to Make peanut butter rice krispie treats
1. Melt the Butter: In a saucepan over medium heat, melt the unsalted butter until it bubbles gently and starts to foam, which takes about 2-3 minutes.
2. Add Peanut Butter: Stir in the peanut butter and honey (or corn syrup) until fully combined, creating a smooth mixture that’s glossy and fragrant.
3. Incorporate Marshmallows: Add the mini marshmallows to the peanut butter mixture. Stir constantly until they’re completely melted and you see a creamy consistency, about 2-4 minutes.
4. Combine with Cereal: Remove from heat and immediately fold in the Rice Krispies cereal, mixing gently until all pieces are evenly coated — don’t rush this step or your treats may crumble!
5. Press into Pan: Transfer the mixture to a greased 9×13 inch pan. Use a spatula or wax paper to press it down firmly until it’s even across the surface.
6. Cool and Set: Let the peanut butter rice krispie treats cool at room temperature for at least 30 minutes until firm — you’ll know they’re ready when you can slice them without sticking.
7. Cut and Serve: Once cooled, cut into squares or rectangles and serve immediately for best texture!
*Exact quantities in the recipe card below.*
How to Store peanut butter rice krispie treats
- Room Temperature: Store in an airtight container or wrap tightly with plastic wrap for up to 3 days. They’ll stay crunchy but may lose some of their initial softness.
- Refrigerator: Keep them in an airtight container, but expect the crispy texture to soften within a week. Use parchment paper between layers if stacking.
- Freezer: Wrap individually in plastic wrap and then place them in a freezer-safe bag for up to 2 months. They freeze well, but the texture might be slightly different once thawed.
- Reheating: Microwave on low for about 10-15 seconds until warm; you’ll know they’re ready when they feel soft but not gooey. The peanut butter rice krispie treats won’t regain their original crunch after storage, so enjoy them fresh whenever possible!
What to Serve with peanut butter rice krispie treats?
It’s sweet enough that a little contrast can really enhance your experience, so pairing it with something fresh or tangy is ideal.
- Fresh Berries: Their tartness cuts the sweetness and adds a juicy texture contrast. Try strawberries or raspberries for best results.
- Cold Milk: A classic choice, the cold temperature balances the richness and makes each bite feel lighter. Serve chilled for extra refreshment.
- Sliced Apples: The crisp texture and mild acidity provide a refreshing balance to the sweetness. I’d go with tart varieties like Granny Smith.
- Greek Yogurt: Its creamy tanginess complements the rich flavors while adding a protein boost. Use plain yogurt to avoid overwhelming sweetness.
- Dark Chocolate Squares: The bitterness of dark chocolate contrasts beautifully with the sweet treats, enhancing flavor depth without being overpowering.
- Coconut Flakes: Toasted coconut adds a crunchy texture that contrasts nicely with its chewy consistency, giving an appealing mouthfeel to your snack.
- Mint Tea: A hot cup provides warmth that balances the coolness of this dish; its herbal notes refresh your palate between bites.
- Citrus Salad: A mix of oranges and grapefruits offers bright acidity that cuts through the richness, making every bite feel more balanced and light.
peanut butter rice krispie treats Variations
Here’s how to play with this recipe and make it your own.
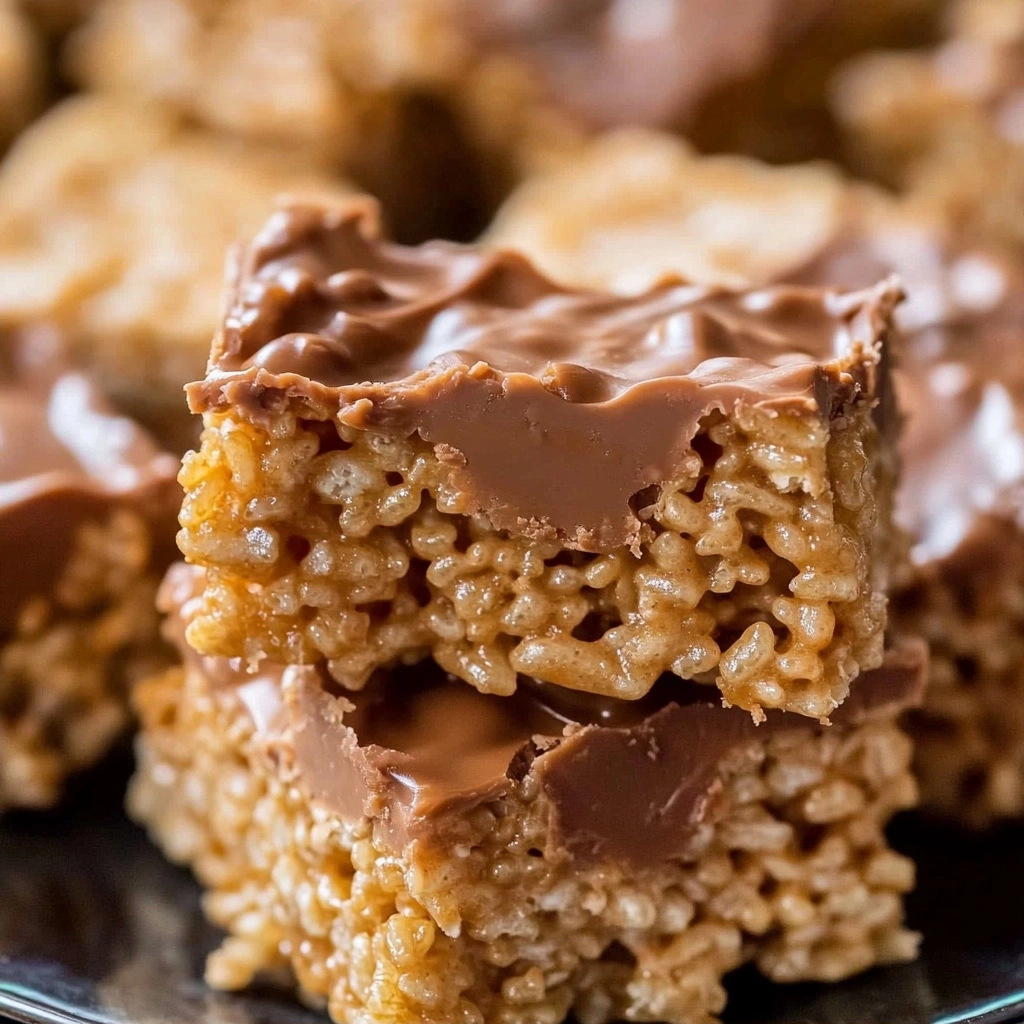
- Chocolate Swirl: Add 1/2 cup melted chocolate when mixing in the peanut butter for a rich twist.
- Nutty Crunch: Mix in 1/2 cup chopped nuts (like almonds or cashews) after the marshmallows for added texture.
- Honey Caramel: Replace honey with 1/2 cup caramel sauce for a sweet, gooey treat.
- Coconut Delight: Stir in 1/2 cup shredded coconut with the Rice Krispies for a tropical flavor boost.
- Peanut Butter Chocolate Chip: Add 1/2 cup mini chocolate chips just before pressing into the pan for extra sweetness.
- Marshmallow Madness: Fold in an extra 1/2 cup mini marshmallows at the end for gooey goodness throughout.
- S’mores Style: Layer crushed graham crackers on top before cooling for a delightful s’mores-inspired crunch!
Make Ahead Options for peanut butter rice krispie treats
I love to prep my peanut butter rice krispie treats ahead of time, making them a great option for busy days. I typically make them up to two days in advance and store them in an airtight container at room temperature. Just be sure to keep them away from humidity to prevent any stickiness. The treats hold up nicely, but if you want that fresh crunch, I recommend cutting them into squares just before serving. Honestly, while the bars stay tasty for a few days, they can get a bit soft if stored too long. So, enjoy the ease of prepping ahead but finish strong with that last-minute cut! Always slice before serving!
peanut butter rice krispie treats Recipe FAQs
Can I make peanut butter rice krispie treats ahead of time?
Absolutely! You can make these treats a day or two in advance. Just store them in an airtight container at room temperature to keep them fresh and chewy. If they become too hard, a quick 5-10 seconds in the microwave can help soften them up again. Just be cautious not to overheat them, as that could change their texture.
Why did my peanut butter rice krispie treats turn out too sticky?
If your treats are overly sticky, it might be due to using too much honey or not enough Rice Krispies cereal. Make sure you measure accurately and try to fold the cereal gently into the melted mixture. The right consistency should feel slightly gooey but still hold together when pressed into the baking dish. A helpful tip is to lightly grease your hands when pressing down the mixture for easier handling.
What can I substitute for honey in this recipe?
You can easily substitute corn syrup for honey if you prefer a different flavor or sweetness level. Maple syrup also works well, but keep in mind it may slightly alter the taste of your treats. Just stick with equal amounts as stated in the recipe for best results. Remember that different sweeteners can affect texture, so adjust accordingly if necessary!
How do I know when this dish is ready to cool?
Your peanut butter rice krispie treats are ready to cool once they’ve been pressed into the baking dish and have a smooth surface on top. They should feel warm but not overly hot when you touch them lightly with your finger. Allowing them to sit at room temperature for about 10 minutes helps set their shape without getting too firm, making cutting easier later on!
Final Thoughts on peanut butter rice krispie treats
Peanut butter rice krispie treats are a fantastic choice for their simplicity and quick prep time, making them an ideal snack or dessert when you’re short on time. With just a few ingredients, you can whip up a delicious treat that satisfies your sweet tooth without any fuss. If you’ve been looking for an easy recipe to add to your go-to list, this one’s a must-try. Let me know how yours turned out in the comments!
peanut butter rice krispie treats
Ingredients
Method
- In a saucepan over medium heat, melt the butter and honey together until smooth.
- Stir in the peanut butter until fully combined and melted.
- Remove from heat and add the mini marshmallows, stirring until they are completely melted and the mixture is smooth.
- In a large mixing bowl, add the Rice Krispies cereal and pour the melted mixture over it.
- Gently fold the cereal into the mixture until evenly coated.
- Press the mixture into a greased 9x9 inch baking dish, smoothing the top with a spatula.
- Allow to cool at room temperature for about 10 minutes before cutting into squares.